A car, like any complex machinery contains components that wear and fail; and in a car, some parts, like brakes, wear by their very nature and should be regularly inspected. So, to be safe, I checked the brakes to make sure they 1) had enough friction material on the pads to be safe and 2) the rotors weren't too badly worn. When I purchased the car, the prior owner told me the front brakes and rotors were replaced and they looked OK, as much as one could tell by looking through the wheel. I'm guessing the super-cheapest brake pad was used based on the observed wear. The rear brakes looked a bit on the dodgey side, enough to get home but probably not enough to pass PA safety inspection.
Do not disturb my circles!

Brakes can be easily done by the shade-tree mechanic (of which I am one, sans the tree), but you'll need some special tools: a tool for winding back the rear calipers or pushing back the front calipers and a breaker bar for removing the tire and, sometimes, the brake hardware. A breaker bar is a metal stick measuring between 24in and 36in with a 3/8 or 1/2 socket at the end. This is a
second-class lever making it easy to remove (and tighten) the wheel lug nuts and loosen other tough fasteners. Many folks think that a impact wrench is required to do this sort of work, but
Archimedes would disagree. Torque is expressed in ft/lbs (if one uses imperial measures) which means 1 lbs of pressure at 1 ft distance is 1 ft lbs. Being 180 lbs, standing on the end of a 3 ft breaker bar puts an amazing 540 ft/lbs of torque on a wheel lug or other bolt.

I've found that the very simple (and cheap!) breaker bar works better than pneumatic tools for a variety of reasons: it can get into tight spaces, it's quiet, you can use standard sockets, the torque is easier to control to name a few. Torque control is important: many times, a garage will over-tighten wheel lug nuts because they'll use a impact drill and just pound the nut into place, way tighter than it needs to be, which puts undue wear on the wheel studs and makes it nearly impossible to change the tire on the side of the road. The torque for most wheel nuts is 90-100 ft/lbs, which is much less than one would think and usually far less than what an air impact wrench will exert by default. Journeymen mechanics will use a torque stick on their impact wrenches when mounting wheels or tightening any fastener, for that matter.
 Noli turbare circulos meos!
 were, reportedly, the last words said by Archimedes before his murder at the hands of a Roman solder sent to retrieve him. Archimedes cleverly used the used the
method of exhaustion, a refinement of
Eudoxus' prior work, to prove the area under a curve is 4/3 the inscribed triangle, a half-step away from
integral calculus, which took us nearly another 2,000 years after his death to figure out. Much of the underlying engineering in a modern car finds its origin based on the physics requiring calculus to describe. One wonders where we would be today if Archimedes' circles were left undisturbed.
Removing the Wheel and Caliper
 |
| Rotor in bad shape too |
Using the breaker bar to loosen the 19mm lug nuts while the car was on the ground, I lifted the rear wheel removed the nuts to pull the wheel. Once the wheel was off the back, the grave condition of the rear brakes became apparent. It was difficult to get an angle to show how little of the braking material remained and the rotors were at the end of their life as well. Judging by the wear marks on rotor, the rear brake pads weren't making the best of contact.
 |
| Carrier bolts |
Two 15mm bolts held the carrier and caliper to the back axle, where the breaker bar was put good use. Once removed, I realized that I should have loosened the caliper pins first, as when firmly attached to the wheel, it's much easier to get leverage. But the caliper pins weren't that difficult to get moving with a little of
PB Blaster and the 13mm bolts loosened. Once free, I used a bungee cord wrapped around the caliper and hooked to the spring to hold the part in place, so it wasn't putting stress on the brake fluid line as this (and the brake cable) where the only things holding the caliper to the car.
 |
| From bad to worse... |
The other side of the car was actually, somehow worse in terms of the brake pad condition. The braking material was literally paper thin. I'm guessing the brakes had another few weeks before the backing plate of the brake pad became the braking material, resulting in a tell-tail grinding sound as it quickly ate away at the rotor, all while doing a poor job of proving stopping power to the car.
Pandora's Other Box
Like many cars, the "parking brake" is integrated into the rear calipers. When replacing the rear brake, you need twist the piston back, opposed to just pushing the piston like on the front brakes. The most common tool for this is a "Pandora's Box", which is nothing like the mythical container. It's a socket end on a 3/8in with a bunch of different keys that fit into the calipers to give traction to wind back the piston.
 |
| Fully extended piston |
In my case, there was no winding back. The piston rotated, but didn't retract. So I reached for my Harbor Freight Special brake tools that can be used to both push and rotate the piston. Still no luck!!
Very frustrated, I unhooked the brake line and parking brake cable and moved the caliper to the bench. All the while, I used an empty oil container to catch the fluid,which I didn't mind loosing because I wanted to replace it (more on that in a later post) otherwise I would have clamped the line. I twisted
 |
| Wound back! |
and worked the parking brake lever until the caliper started retracting and with the Pandora's Box was able to wind the piston back into the caliper. Success! From the picture, you can see the dust boot around the piston is twisted, I used some WD40 to lube it up and set it straight before installation.
Don't Forget the Hardware!
 |
| New hardware installed |
 |
| Old vs. New hardware |
The brake pad rest in carriers that hold them in place while the piston in the caliper squeezes the pads against the rotor to convert kinetic energy into heat. Where the brake pads make contact with the carrier, there's some "hardware" that should be replaced with every brake change. Because of the conversion of energy into heat, all brake parts will go through heating and cooling cycles which will result in the metal becoming brittle and in some cases, with enough moisture and time, fusing with the surrounding carrier. It looks like the hardware was the same shipped with the car and it was deteriorated in some places and melded with the carrier in others. Once removed, I cleaned the surface with a wire brush to remove any extra material. I then Dabbed a bit of brake grease on the carrier and inserted the new hardware, with a little grease on the top side as well.
 |
| Old vs. new pads |
 |
| Caliper pins |
The other bits of hardware are the caliper pins, dust boots and bolts. These looked to be in good condition, so I cleaned them first with some brake cleaner, wiped them down and applied some fresh brake grease and back in the carrier they went. Many first-timers don't grease the caliper pins or forget to first clean them before adding more lubricant. Just like everything else on a car, the lubricant will wear out. Paying attention to the pins is an important part of the job and will help the brakes work more effectively over their service life.
The dust boots (the black things on top) of the caliper pins were in good condition, so no need to change those. If you see any cracking, these should be replaced to keep dust and water out, as foreign matter will reduce the efficacy of the lubricant.
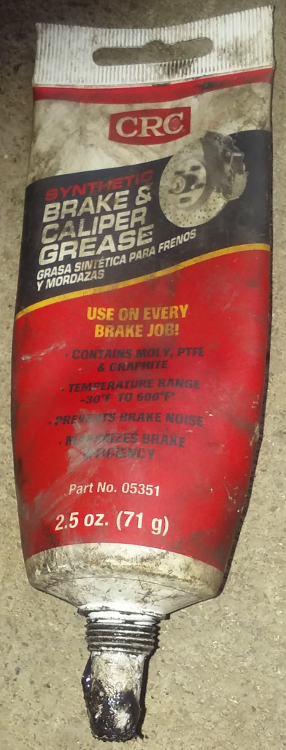
Brake Grease
Brake grease is special, important, different stuff, despite the paradoxical name. It's designed to withstand the high

temperature of the braking system (recall, we're converting all that momentum of the car into heat and that heat will warm the entire braking system) while still doing it's lubrication job. Eventually, if not re-applied, the caliper pins will become dry and due to the combination of heat and moisture, will become stuck and then the brake pads will not be positioned correctly resulting in uneven wear between the inside and outside pads.
Brake grease comes in single-serving packets at the check-out and it sometimes included with the brakes pads. I spring for the big container, it's much more economical in the long run.
As the Rotor Turns
The pads and rotor work and wear together. Depending on the car, these should be replaced at the same interval, though I know many people follow the rotor replacement with every other pad replacement regimen. The softer pads wear faster than the harder metal of the rotor, however, eventually, enough of the rotor will be worn away such that it will no longer be able to serve as a reliable mating surface for the pads.
Many brake shops will have a tool to smooth the surface of the rotor at the
 |
| Old vs. New Rotor |
expense thinning the rotor itself, called "turning". A thinner rotor, through wear or tooling, will not have the same heat bearing capacity, as it is thinner, resulting in overheating and warping of the rotors yielding poorer braking performance and a shudder when applying the brakes. If the rotor is in good enough shape to turn, there will be some markings indicating the minimum rotor thickness. I've replaced the rotors with the brakes by default when
 |
| Minimum thickness markings on rotors |
doing work myself, putting the DIY labor savings into better parts. Rotors cost about $40 from various mail-order places, so it's not that much more cash versus re-surfacing the existing rotors.
On this car, there's nothing holding the rotor in place other than N many years of rust and friction between the rotor and hub, nonetheless, removing the rotor requires a "tap" from a hammer. My hammer of choice is the ever-so-handy
dead blow hammer: a plastic, hammer-shaped shell, filled sand. This hammer is much better than a metal hammer in that there's very little recoil when the striking the surface. Proper "tapping" involves several hits on the face of the old rotor as close to the edge as possible with the maximum of force per swing.
 |
| Use this! |
Before installing the rotor, I used brake cleaning fluid to remove the oil coating the part left after manufacturing. Cleaning the new rotors must be done before installation! New rotors will have a thin sheen of oil to prevent rusting while in storage, leaving this oil on the rotor surface will dangerously compromise the braking effectiveness and even spoil the newly installed braking pads. Bottom line: spend the 2$ on brake cleaner, use it liberally with single-use paper towels to remove the preservative oil on the rotors before installation. I think I purchased brake cleaner 5 years ago and still haven't used the whole can despite many brake jobs over the years.
Re-assembly
The rotor is fit on the wheel studs first, but first some anti-seize compound around the wheel hub so the rotor will require less "tapping" the next time around. For this car, I'd be surprised if it lasted long enough to require new rear brakes (as they do less of the braking, they'll last longer), just in case I have my bases covered.
After the rotor, the brake pads in the carrier were fitted next. Once the brakes were in the carrier, the carrier was bolted back to the axle over the rotor with the 13mm bolts. The carrier bolts were then tightened, I didn't know the torque so I have them about 1/4 turn with my breaker bar after being "tight" with a hand-socket. The caliper was slipped on top of the brakes and the caliper pins twisted to "hand tight". Caliper pins generally don't require that much torque to stay put, they don't take the force of stopping the car, so don't feel the need to over do it, you'll thank yourself the next brake change.
Sorry for a lack of re-assembly pictures! I was enjoying this work and taking pictures slipped my mind.
Brakes: Always by Axle
Before closing this post, I wanted to let you know brakes were done for both of the back wheels at the same time. Brakes must be done in pairs (front/back) or the car will have more grabbing power on one side of the car versus the other and will be dangerous to drive. Similarly, rotors must always be done pair-wise as well, even if one looks much worse than the other, both must be replaced at the same time. If you buy a la carte brake pads are always sold in pairs and rotors individually. I've noticed that RockAuto and Amazon are now selling kits including a pair of rotors and the pads in a single purchase -- but this isn't always less expensive, so shop around.